Scenery:
I don't mean the outdoor natural scenery. I'm referring to the indoor scenery that represents my attempt to duplicate a scale version of what is outside the train building. For the dirt ground cover, I just go outside the train building and scoop up buckets of the sandy soil, which I sift into various sizes from very fine (63 microns or .0025 inches) to large-scale rocks. Part of the ground cover is hard-shell with rock castings. As you can see, some actual large rocks of sandstone were used. On the wall with the wood tunnel portal the corner was coved, and rock castings were applied. The painted backdrop was transitioned into the castings. Checkout the section on backdrops to see how I coved the oposite corner and how I transitioned the cove to the existing backdroop.


Ground Cover:
For ground cover, as in weeds, bushes and grasses, I use products from several different manufacturers including Scenic Express, Woodland Scenics and Bachmann. I also use their products to make my own ground cover and tree foliage. Ground and clump foam has become a key product in our hobby. The foam is available in fine, very fine, course and clump. Scenic Express has a foliage fiber with perfectly sized ground foam “leaves”. It’s great. Unfortunately in large scale, when using sagebrush to make trees, a twenty-foot tall tree costs about $20 in Express foliage. I find it more economical to make my own tree foliage, and vegetation mats (grass, bush and weed).
At one point I experimented with making “mat” vegetation ground cover. Not sure why I went through all the effort. I already have enough mat and other ground cover to re-landscape my railroad twice over. And, as I am modeling a part of New Mexico that is arid, it’s not like I need a whole lot of ground vegetation. My justification was that as the existing ground cover on the layout gets dusty I can just scrape it off and replace it.
I came up with several techniques for making mat vegetation ground cover. In some cases I start with a sheet of blue industrial strength paper shop towels or a heavy duty paper drop cloth. The back side of the drop cloth has a thin water proof film layer. I seperated the paper from the water proof film. I spray paint the paper towel, paper drop cloth and the film dark brown. I then spray on 3-M adhesive. It's best not to use the heavy duty adhesive and it is best too just lightly dust the paper towel. I sprinkle fine ground foam over the adhesive. I usually start with lite brown or yellow brown. I do a light spray adhesive over that and then add green course ground foam in a random pattern. After drying, I rip the mat into the desired shapes. If you use too much spray adhesive or if you use the heavy duty adhesive the mat becomes to "rubbery" and it becomes very hard to rip apart. Using “sticky” glue I apply to desired locations on the layout. For diversity and visual impact I use a combination of Scenic Express mat and my mat to achieve the desired results. Examples of my various techniques follows.
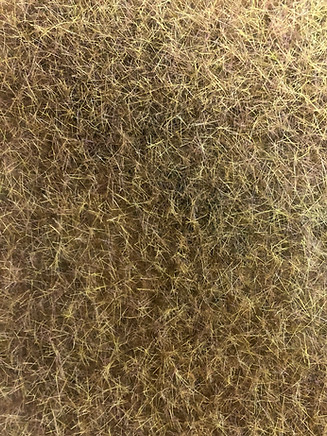
For grass I pour dilute white glue or concrete adhesive in a plastic tray or on a piece of wax paper. I drive a nail into the adhesive, through the tray into a board. I clip the wire to the nail from the static grass applicator. I apply the static grass in various colors and sizes. It takes a little trial and error to figure out how much glue to use and how diluted it should be. If the glue it too thick it's a little hard to work with. When pouring the adhesive/glue directly into a plastic container figuring out what is too much, not enough or just right takes practice. My experience is that not enough is better than too much. Actually, "not enough" has its advantages. When using wax paper, shop paper towels, or some other base material the key is too make sure that the base material is saturated and has a film of adhesive on the surface.
Of course you can, and I have, apply static gras directly on your layout. When doing so I do not thin the white glue very much. I put the glue down in random shapes. I use various lengths of static grass and use the static grass applicator from Noch. Unfortunately, the grass doesn't always stand straight up. If you're careful, you can use a small vacuum cleaner with hose and medium size nozzle to suck the grass up straight. It may take a couple of attempts before you figure out how high the hose nozzle needs to be above the grass.
I should probably point out that I am seldom fully satisfied with how the applied ground cover turns out. The last two photos on this page show examples of my effort that I feel does not quite capture the vegetation that exists in the Chamita area of New Mexico.


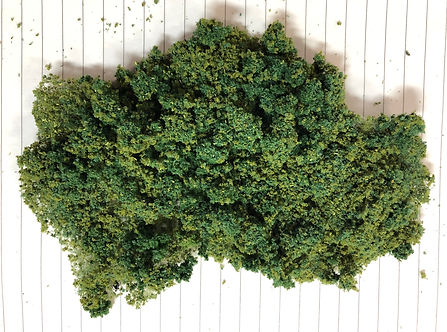
Three examples of ground cover using poly fiber. Spray adhesive was sprayed on one side of green poly fiber. Fine to course ground foam was applied to adhesive. To create a thicker ground cover spray adhesive is applied over ground foam and additional ground foam is added. Once dry, the large pieces can be torn into the required size and shape. Depending on the adhesive, cutting with a scissor may be required.

The image on the left is a blue paper towel painted brown. The image directly below shows vegetation added to the paper drop cloth and the drop cloth film. The images below that show what the final vegetation mats look like on paper towels. As you can see no two mats look alike as I use a very random approach to adding vegetation. As stated above I use ground foam of different sizes and colors and I use static grass of different size and color.


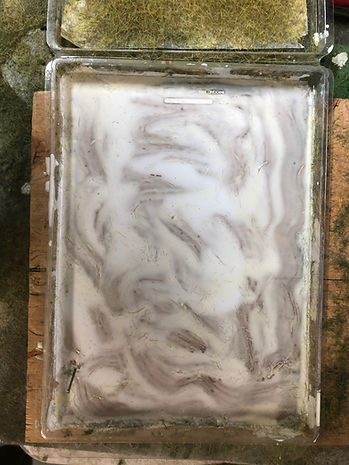
Image on the left is concrete adhesive over wax paper. Image on the right is concrete adhesive poor directly onto the plastic tray. The two lower left images show static grass applied to the wax paper. The two lower right images show static grass directly applied to the adhesive/glue. The bottom lower right one had ground foam applied on top of the static grass. Once the adhesive/glue is totally dry it can be pealed off of the plastic tray. The fifth image is the result of applying a relatively thin layer of adhesive. It definitely has it's advantages because the resulting clumps are very random.


